There are few things more annoying than plugging your laptop into a monitor, expecting everything to appear instantly, and being greeted by a stubborn black screen.
You check the cable, unplug the adapter, plug it back in, and somehow the screen still says “No Signal.” It’s the kind of little tech problem that can turn a perfectly ordinary morning into a surprisingly long troubleshooting session.
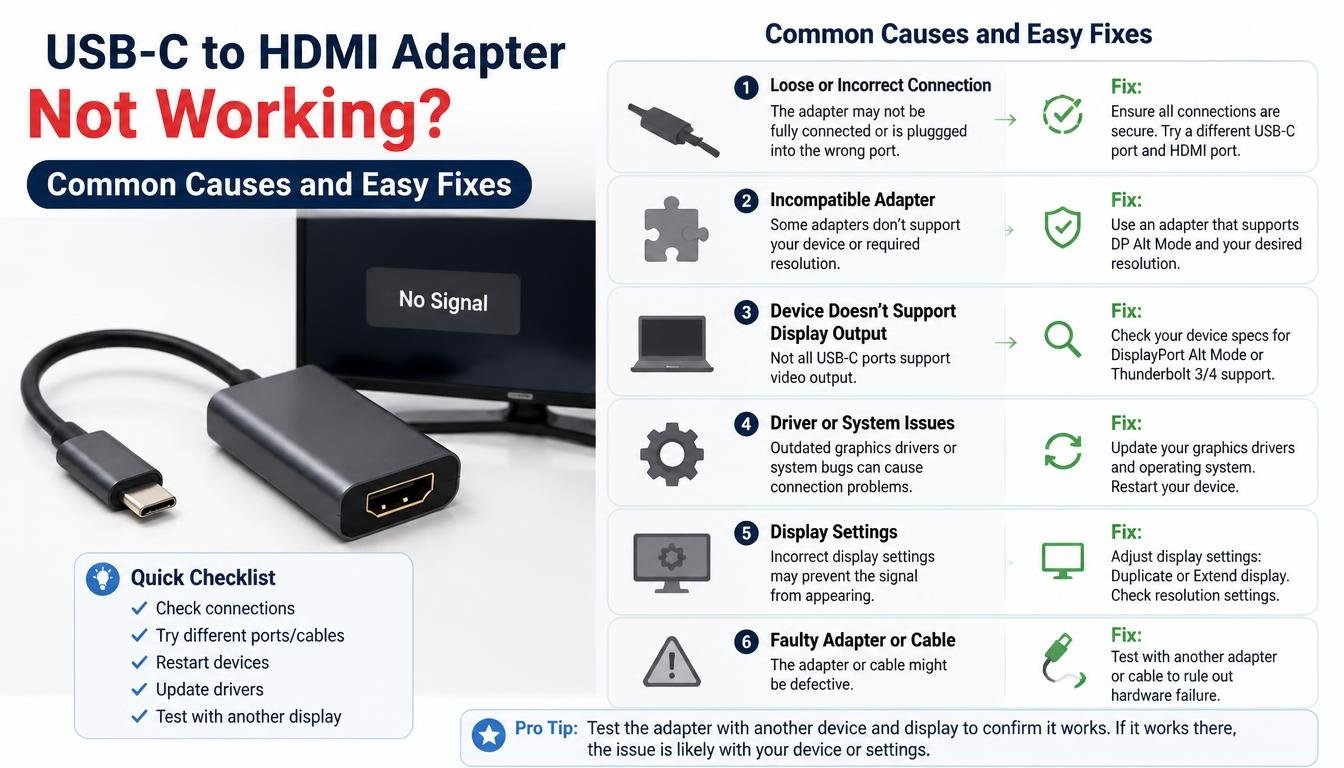
If your USB-C to HDMI adapter is not working, don’t assume the adapter is broken just yet. The problem could be something as simple as the wrong monitor input, an incompatible
USB-C port, an outdated graphics driver, or a display setting that needs a small adjustment. Thankfully, most of these issues can be checked at home without buying new equipment.
Whether you’re connecting a laptop to a 4K monitor, setting up a presentation, enjoying movies on a bigger screen, or building a multi-display workstation, this guide walks you through the common causes and practical fixes.
We’ll cover hardware compatibility, HDMI cable problems, Windows and macOS settings, resolution issues, overheating, and how to decide when it’s finally time to replace your adapter.
Why Is Your USB-C to HDMI Adapter Not Working?
A USB-C to HDMI adapter converts compatible video signals from a computer, tablet, or other source device into an HDMI signal that a monitor or television can display. Although the connector looks small and straightforward, several things must work together for a successful connection.
The source device needs to support video output through its USB-C port, the adapter must support the required display standard, and the HDMI cable and monitor must receive a compatible signal. If even one part of the chain fails, the external display may remain blank.
Here are some common symptoms and what they might indicate:
- USB-C to HDMI adapter no signal: The monitor may be using the wrong HDMI input, or the source device may not be transmitting video.
- External monitor not detected: Your computer may not recognize the display because of compatibility, driver, or configuration problems.
- USB-C HDMI adapter black screen: The display resolution, refresh rate, cable, or adapter may be causing trouble.
- Intermittent display connection: A loose connector, damaged cable, unstable port, or overheating adapter may interrupt the signal.
- Audio without video, or video without audio: The HDMI audio output may need to be selected separately, or the video connection may be only partially working.
Identifying the symptom first can save you from trying random fixes. There’s no reason to update every driver on your computer if the monitor is simply set to the wrong input.
1. Check Whether Your USB-C Port Supports Video Output
One of the most overlooked causes of USB-C HDMI connection problems is port compatibility. USB-C describes the physical connector, not every function the port can perform.
Some USB-C ports support charging and data transfer but cannot send video to an external display. Others support video output through DisplayPort Alt Mode or Thunderbolt technology, making them suitable for a compatible USB-C to HDMI converter.
How to check your USB-C port
Start by checking your laptop or tablet manufacturer’s specifications. Search for the exact model name followed by phrases such as “USB-C video output,” “DisplayPort Alt Mode,” or “Thunderbolt display support.”
You may also notice a small DisplayPort or Thunderbolt symbol beside the port, although the absence of a symbol doesn’t always mean video output is unsupported. The manufacturer’s documentation is the more reliable source.
If your device supports DisplayPort Alt Mode, a compatible adapter can generally convert that video signal to HDMI. Thunderbolt 3 and Thunderbolt 4 ports also support external displays, but the capabilities of the complete setup still depend on the computer, adapter, and monitor.
What if your USB-C port only supports charging?
Unfortunately, changing Windows settings or reinstalling graphics drivers won’t make a data-only USB-C port send a native video signal.
You may need a compatible video-capable port, a suitable Thunderbolt connection, or a USB graphics adapter that uses a different technology, such as DisplayLink, if your device and operating system support it.
Before purchasing another adapter, confirm the port’s capabilities. This one little check can save you money and a fair amount of frustration.
2. Inspect the HDMI Cable and Adapter Connections
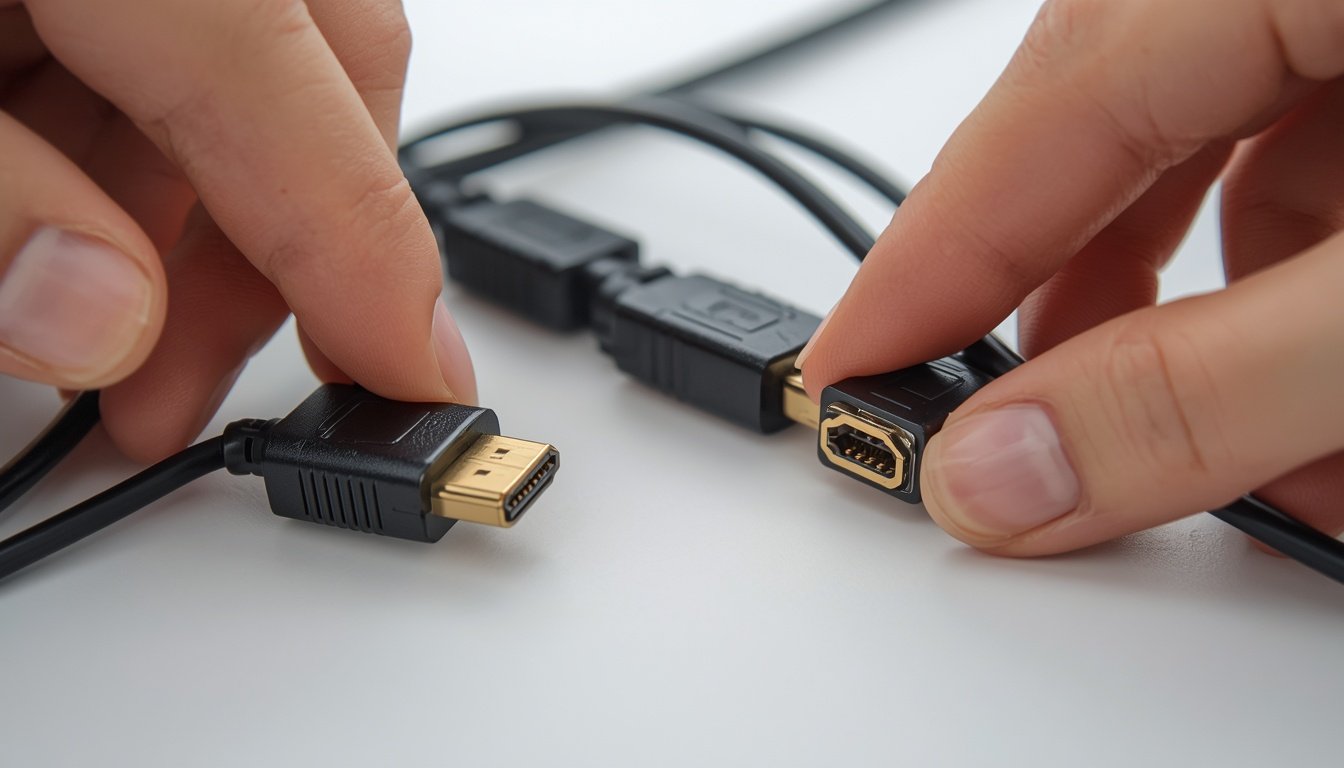
Sometimes the problem isn’t technical at all. It’s a loose connector that looks perfectly fine until you remove it and push it back in properly.
A loose HDMI connection can interrupt signal transmission, while a damaged cable may prevent the monitor from receiving any image. Even a new adapter can struggle when paired with a faulty or unsuitable HDMI cable.
Try these simple connection fixes
- Disconnect the USB-C adapter from your computer and reconnect it firmly.
- Remove the HDMI cable from both the adapter and monitor, then reconnect both ends.
- Check the HDMI connector for bent parts, visible damage, or unusual looseness.
- Try another HDMI cable that you know works with a different device.
- Connect the adapter directly to your laptop instead of using an additional hub or docking station.
- If possible, test the adapter with another compatible monitor or television.
Testing one component at a time is important. If you change the adapter, cable, monitor, and computer simultaneously, you’ll have no idea which change actually solved the problem.
For example, imagine your laptop works perfectly with a television using the same HDMI cable, but the monitor remains blank. That result points toward the monitor’s input settings or compatibility rather than immediately suggesting a faulty cable.
3. Select the Correct HDMI Input on Your Monitor
Your computer may be sending video successfully, while your monitor is patiently waiting for a signal from another port. It happens more often than people expect, especially with monitors that have multiple HDMI inputs.
Most displays let you select between HDMI 1, HDMI 2, DisplayPort, and sometimes USB-C. If your cable is connected to HDMI 2 but the monitor is set to HDMI 1, the screen may display a “No Signal” message.
How to fix the input source
- Turn on the monitor and open its on-screen menu.
- Find the setting labelled Input, Source, or Input Source.
- Select the HDMI port where your adapter is connected.
- Wait several seconds for the display to detect the signal.
- If the monitor has automatic input selection, try choosing the correct input manually instead.
Also make sure the monitor itself is powered on and functioning. A monitor with a failed power supply or damaged HDMI port can produce symptoms that look remarkably similar to a laptop connection problem.
If you’re using a television, check that it is set to the corresponding HDMI input rather than its built-in TV channels or another connected device.
4. Restart Your Laptop, Tablet, and Monitor
Restarting may sound like advice from a tech support script, but there is a good reason it works. Computers sometimes fail to establish a display connection correctly after waking from sleep, switching between docks, or reconnecting accessories.
A restart can refresh the graphics system and allow the computer to identify the external display again.
Follow this restart sequence
- Disconnect the USB-C to HDMI adapter.
- Turn off the external monitor.
- Restart your laptop or tablet.
- Turn the monitor back on and select the correct HDMI input.
- Reconnect the adapter and allow a few seconds for detection.
If the monitor has a separate power switch, turn it off briefly before switching it on again. Some displays retain their previous connection state, and a fresh startup can help.
For a stubborn USB-C display output not working issue, this is a sensible early step because it is quick, free, and unlikely to cause unwanted changes to your system.
5. Fix External Monitor Detection in Windows
If you’re using a Windows laptop, the computer may recognize the adapter but fail to activate the external screen. Windows display settings give you several options for identifying and configuring a connected monitor.
Use the Windows display settings
On Windows 10 and Windows 11, right-click an empty area of the desktop and choose Display settings. Under the display arrangement section, look for the option to detect another display, if available in your version of Windows.
You can also press Windows + P to open the projection menu. Choose the mode that suits your setup:
- PC screen only: Shows the desktop on the laptop screen alone.
- Duplicate: Displays the same content on both screens.
- Extend: Gives you a larger desktop spread across both displays.
- Second screen only: Uses the external monitor while turning off the laptop’s built-in display output.
If your goal is to use a second monitor for work, Extend is usually the most flexible option. Duplicate is better when you want other people to see exactly what’s on your laptop screen during a presentation.
What if Windows still doesn’t detect the monitor?
Disconnect the adapter and reconnect it after opening Display settings. Check whether your computer has pending system updates, and install appropriate graphics driver updates from your laptop manufacturer or the relevant graphics hardware provider.
If the external display worked before a recent driver update but stopped afterward, the update may have introduced a compatibility issue. In that case, checking the manufacturer’s recommended driver version or rolling back the problematic driver, where available, may help.
Windows 8 and older systems have different menus and may use different driver packages, so follow the instructions appropriate to your installed version. Avoid downloading drivers from unfamiliar websites, since the wrong package can create more trouble than it solves.
6. Troubleshoot USB-C to HDMI on macOS
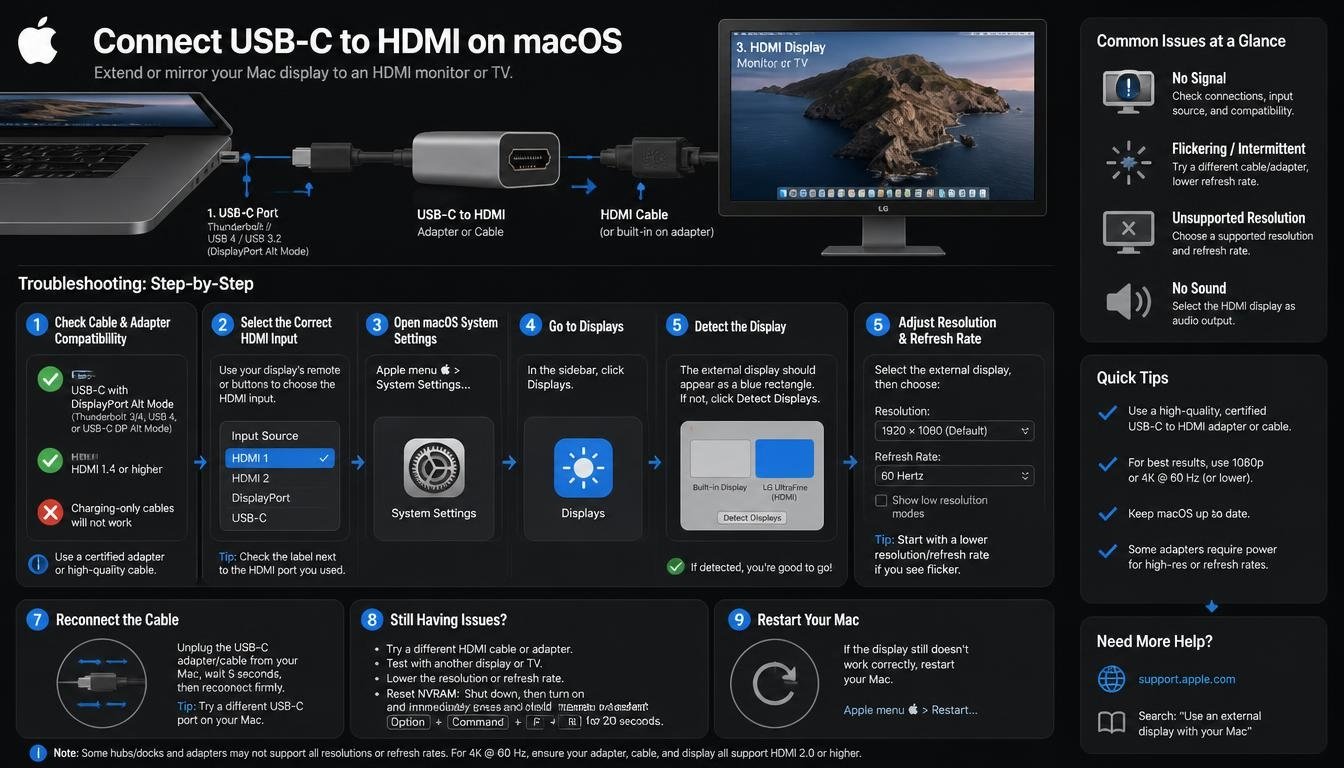
Mac users may encounter similar issues, although the settings are arranged differently. A Mac can sometimes connect to an external monitor without automatically choosing the display arrangement or resolution you want.
Open System Settings → Displays
On recent versions of macOS, open the Apple menu, select System Settings, and choose Displays. On older versions, the equivalent option is found under System Preferences.
If the monitor appears in the settings, select it and check its resolution, refresh rate, and arrangement options. You can configure the display to mirror your Mac’s screen or extend the desktop, depending on your needs and the capabilities of the device.
If the display does not appear, disconnect and reconnect the adapter, verify the HDMI input, and restart your Mac.
Some older macOS versions provide a Detect Displays option when a modifier key is held while viewing the Displays settings. The exact behavior varies by version, so check the instructions for your installed release rather than expecting the same control everywhere.
Check Mac and adapter compatibility
Not every Mac supports the same number of external displays or the same maximum resolution. Some models impose display limits even when the adapter itself supports multiple monitors or 4K output.
Confirm that your Mac model supports the desired display arrangement. If you’re connecting a newer high-resolution monitor to an older computer, the limitation may belong to the Mac rather than the adapter.
7. Adjust Display Resolution and Refresh Rate
A monitor may be connected and detected but still show a black screen, flicker, or display an unsupported-signal warning. One possible explanation is that the computer is sending a resolution or refresh rate that the monitor, adapter, or cable cannot handle reliably.
This is especially relevant when using a USB-C to HDMI 4K adapter with a high-resolution monitor.
Start with a compatible resolution
If your monitor supports Full HD, try setting the output to 1920 × 1080 resolution first. This is a useful diagnostic setting because it is widely supported by modern displays.
Next, select a refresh rate of 60 Hz, provided that the monitor and adapter support it. If the display works at this setting, you can gradually increase the resolution or refresh rate to identify where the connection becomes unstable.
On Windows, open Display settings, select the external monitor, and look for Display resolution and Advanced display. The available refresh-rate choices depend on the monitor, graphics hardware, cable, and adapter.
On macOS, open System Settings → Displays and select a supported resolution and refresh rate from the available options.
Can every USB-C to HDMI adapter support 4K at 60 Hz?
No. Some adapters support 4K at 30 Hz, others support 4K at 60 Hz, and some provide different capabilities depending on the source device and HDMI version.
The entire connection must support the selected mode. A 4K-capable monitor alone does not guarantee 4K at 60 Hz, nor does a laptop with video output automatically provide every resolution and refresh rate through every adapter.
If the screen works at a lower resolution but fails at 4K, check the specifications for the adapter, HDMI cable, computer, and display before concluding that the hardware is defective.
8. Update Graphics Drivers and System Software
Graphics drivers help your operating system communicate with the computer’s graphics hardware and manage connected displays. An outdated, corrupted, or incompatible driver can interfere with external monitor detection.
However, drivers aren’t always the culprit. If the USB-C port does not support video output, no software update can add that missing hardware capability.
How to troubleshoot graphics drivers on Windows
Open Device Manager and expand the Display adapters section. Identify your graphics hardware, then check for available driver updates through Windows Update or the computer manufacturer’s support website.
For laptops with integrated and dedicated graphics, use the manufacturer’s recommended driver combination when possible. Installing a random driver package just because its description mentions HDMI is not a great idea.
After updating, restart the computer and reconnect the display.
What about macOS and ChromeOS?
On macOS, graphics support is generally delivered through system updates rather than separate consumer-installed graphics driver packages. Check Software Update and install compatible updates when appropriate.
On ChromeOS, open Settings and check for system updates. Also verify that your Chromebook model supports external display output through the particular USB-C port you’re using.
Some adapters are marketed as driver-free or Plug & Play USB-C adapters, which means they don’t normally require separate software on supported systems. That doesn’t mean every adapter works with every device, however. Compatibility still matters.
9. Check for Adapter Overheating and Power Issues
An adapter that works for a few minutes before disconnecting deserves a different kind of investigation from one that never works at all.
Compact adapters can become warm during normal use. An aluminum alloy USB-C HDMI adapter may help spread heat away from internal components, but an aluminum chassis does not guarantee that the device will never overheat or lose its signal.
Signs that heat may be affecting the connection
- The display works initially, then disconnects after prolonged use.
- The adapter becomes unusually hot compared with its normal operating temperature.
- The screen flickers or repeatedly reconnects during demanding tasks.
- The connection becomes stable again after the adapter cools.
If you notice these symptoms, disconnect the adapter and let it cool in a well-ventilated area. Avoid covering it with fabric or leaving it pressed against another heat-producing device.
If the adapter becomes excessively hot, smells unusual, or shows visible damage, stop using it. Replacing a suspect adapter is safer than repeatedly testing it under the same conditions.
Could a low laptop battery affect HDMI output?
Sometimes power management can contribute to connection instability, particularly when multiple accessories are connected to a laptop with limited available power. The exact behavior depends on the computer and the adapter.
Try connecting the laptop to its normal power source, disconnecting unnecessary USB accessories, and testing the display again. If you use a hub or docking station, connect the display adapter directly to the laptop to see whether the extra equipment is contributing to the problem.
Remember, a simple USB-C to HDMI adapter usually receives the video signal from the computer and does not necessarily need a separate power supply. Powered docks and more complex display accessories may have different requirements.
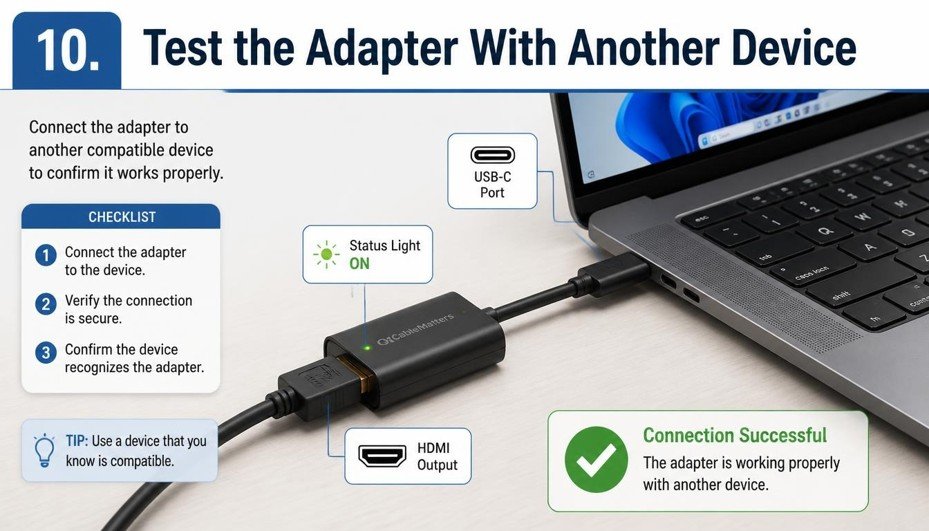
10. Test the Adapter With Another Device
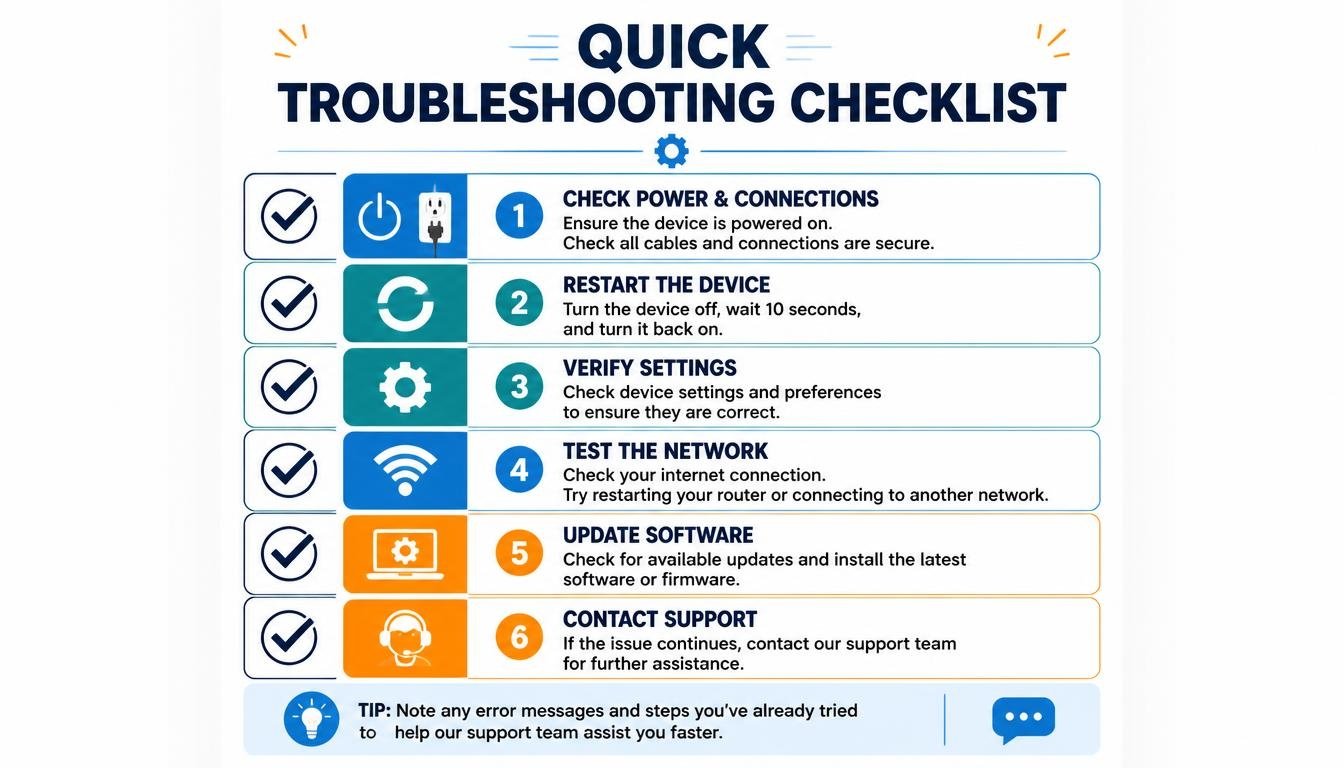
If you’ve checked compatibility, connections, monitor inputs, drivers, and display settings, it’s time to isolate the hardware itself.
Connect the adapter to another laptop or tablet that you know supports USB-C video output. Use the same HDMI cable and monitor if possible.
If the second device works, the original computer’s port, software, or display configuration may be responsible. If the adapter fails with multiple compatible devices, try another known-working HDMI cable before declaring the adapter faulty.
You can also test your original laptop with another compatible USB-C to HDMI adapter. These simple cross-checks help distinguish between an adapter defect, a cable issue, and a source-device problem.
Avoid testing with an incompatible device and treating the result as proof of failure. A USB-C port that supports charging only cannot validate a video adapter, no matter how many times you reconnect it.
Frequently Asked Questions
Why is my USB-C to HDMI adapter not working even though it is connected?
The USB-C port may not support video output, the monitor may be using the wrong HDMI input, or the adapter and display may not support the same video mode. Check these three things first before moving on to software troubleshooting.
How can I tell whether my USB-C port supports HDMI output?
Check the computer manufacturer’s specifications for DisplayPort Alt Mode, Thunderbolt support, or another documented video-output capability. The presence of a USB-C connector by itself does not confirm display support.
Why does my monitor say “No Signal” when connected through USB-C?
The computer may not be sending a compatible video signal, or the HDMI cable, adapter, input selection, or display configuration may be causing the problem. Test each part of the connection separately.
Do USB-C to HDMI adapters require drivers?
Many standard adapters that use DisplayPort Alt Mode are driver-free on compatible devices. Certain USB graphics adapters, including some that use DisplayLink technology, may require additional software. Follow the instructions for the exact adapter model.
How do I fix a USB-C HDMI black screen?
Reconnect the cables, verify the monitor input, restart the devices, and try a lower supported resolution and refresh rate. If the display is detected but remains blank, check the computer’s display configuration and adapter compatibility.
Can a USB-C to HDMI adapter support 4K at 60 Hz?
Yes, some models support 4K at 60 Hz, but not all of them. Your computer, adapter, HDMI cable, and monitor must all support the required display mode.
Why does my USB-C HDMI adapter keep disconnecting?
A loose connector, damaged cable, overheating, incompatible display mode, or problem with the source device can cause repeated disconnections. Try a direct connection without extra hubs and check whether the adapter becomes unusually hot.
Can a faulty HDMI cable prevent the monitor from being detected?
Yes. A damaged or unsuitable HDMI cable can prevent a stable video connection, even when the computer and adapter are working correctly. Testing with a known-working cable is one of the easiest ways to rule this out.
USB C to HDMI Not Working
If your USB-C to HDMI connection is not working, check whether your device supports video output through DisplayPort Alt Mode. Reconnect the HDMI cable, select the correct monitor input, and check your display settings.
USB A to HDMI
USB-A ports generally do not support native video output, so you may need a compatible USB-A to HDMI adapter with the required drivers. Check the adapter’s compatibility with your operating system before using it.
HDMI to USB C Not Working
If HDMI to USB-C is not working, check whether your adapter supports the correct signal direction and your device’s requirements. Many USB-C displays require a specific HDMI-to-USB-C converter that supports video input and may need additional power.
USB C to HDMI Adapter Not Working
A USB-C to HDMI adapter may stop working because of an unsupported USB-C port, a loose cable, incorrect display settings, or incompatible resolution. Try another HDMI cable, check your device’s video output support, and set the display to a compatible resolution.
USB C to HDMI Not Working Android
If USB-C to HDMI is not working on Android, make sure your phone supports wired video output, as not all Android devices offer this feature. Also, check adapter compatibility, reconnect the cable, and enable any supported external display or screen-mirroring option.
Read More: https://techbiton.com/macbook-only-detects-one-monitor/
Conclusion: Get Your External Display Working Again
A USB-C to HDMI adapter not working can feel like a complicated hardware failure, but the cause is often surprisingly ordinary. It might be an incompatible USB-C port, a loose HDMI cable, a monitor waiting on the wrong input, or a display resolution that needs adjusting.
Start with the simplest checks, then move on to operating system settings, driver updates, power management, and hardware testing. This step-by-step approach makes troubleshooting more efficient and helps you avoid spending money on equipment you may not need.
If the adapter proves faulty, choose a replacement based on verified compatibility, resolution support, build quality, and reliable customer support rather than marketing claims alone.
Most importantly, don’t let one blank screen ruin your whole afternoon. With a little patience and a methodical approach, you can often restore your external display and get back to your presentation, your work, or that film you’ve been meaning to watch on the big screen.
And when everything finally appears on the monitor, even the familiar desktop wallpaper can feel like a small victory.