
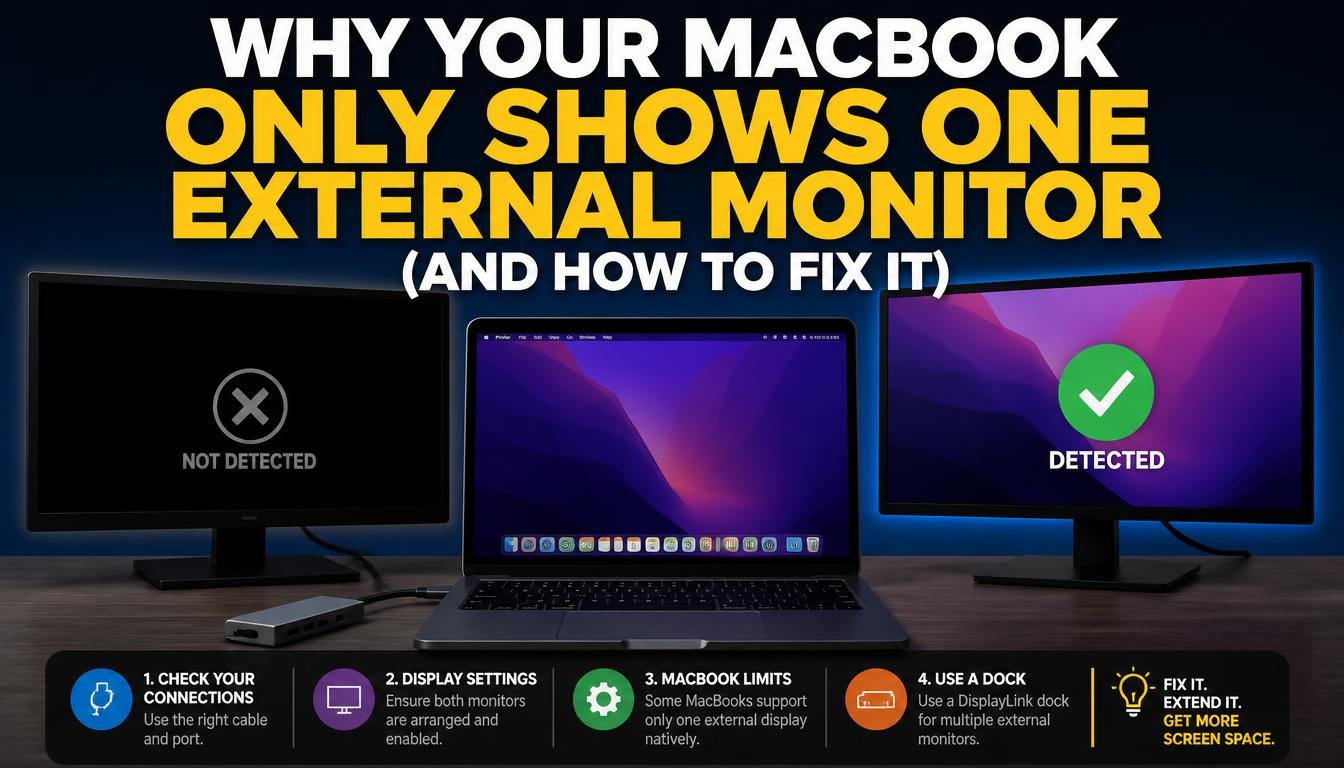
There is something wonderfully satisfying about opening your MacBook, connecting two external monitors, and watching your workspace spread across three screens.
One display holds your spreadsheets, another keeps your research tabs open, and your MacBook screen stays free for messages, notes, or whatever little task needs attention next.
Then, rather rudely, only one external monitor lights up.
You unplug a cable, reconnect the docking station, restart macOS, and perhaps give the second monitor a suspicious look, as if it has personally decided to ruin your afternoon.
If your MacBook only detects one external monitor, you’re certainly not alone. The issue may be related to your MacBook’s display limitations, an incompatible USB-C hub, incorrect display settings, or outdated software.
Not every MacBook supports the same number of external displays, and not every docking station can extend two independent screens.
In this guide, we’ll explore why your MacBook only detects one monitor, explain external display limitations across Apple Silicon models, and walk through practical troubleshooting steps to get your dual-monitor setup working properly.
Why Your MacBook Only Shows One External Monitor
Before replacing your HDMI cable or ordering an expensive dock, it helps to understand what your MacBook is doing behind the scenes. Two monitors connected to the same accessory don’t necessarily mean your computer can drive two independent external displays.
The distinction matters more than most people realise, especially when a docking station advertises multiple HDMI ports in large, confident lettering.
Your MacBook May Have a Built-In Display Limit
One of the most common explanations for a MacBook only shows one external monitor problem is the computer’s native display-support limit. Different MacBook generations and chip configurations support different numbers of external screens.
For example, the base M1 MacBook Air and base M1 13-inch MacBook Pro officially support one native external display. The base M2 MacBook Air also supports one native external display, even though the computer can feel remarkably powerful during everyday work.
That doesn’t mean the machines are defective. It simply means their native display capabilities have limits, and a regular USB-C hub cannot magically remove those limits.
Some higher-end configurations, including various MacBook Pro models with M1 Pro, M1 Max, M2 Pro, and M2 Max chips, support multiple external displays.
The exact number depends on the chip and MacBook model, so checking the specifications for your particular machine is worth the small effort.
Your Dock Might Be Duplicating the Same Video Signal
A USB-C docking station can provide HDMI ports, USB connections, Ethernet, audio, and charging through a single cable. However, having two HDMI sockets does not automatically mean the dock can deliver two independent extended desktops.
Some docks use video signal splitting or rely on the host computer’s native display outputs. Others use DisplayLink technology to create additional displays through a compatible USB connection.
If a dock duplicates one signal across two monitors, you may see the same desktop on both screens rather than two separate workspaces. In other configurations, only one monitor may work because the MacBook cannot provide the required native display outputs.
This is why checking the dock’s actual display technology is much more useful than counting its ports.
macOS May Not Have Detected the Second Screen
Sometimes, the hardware is perfectly capable of running both displays, but macOS simply hasn’t detected one of them correctly.
A loose connector, an unsupported resolution, a sleeping monitor, or a temporary software glitch can prevent the second screen from appearing. Happily, these problems are often fixable without spending any money.
Before assuming your MacBook has reached its limit, a few careful checks can save you a surprising amount of frustration.
Check Apple Silicon Compatibility Before Changing Anything
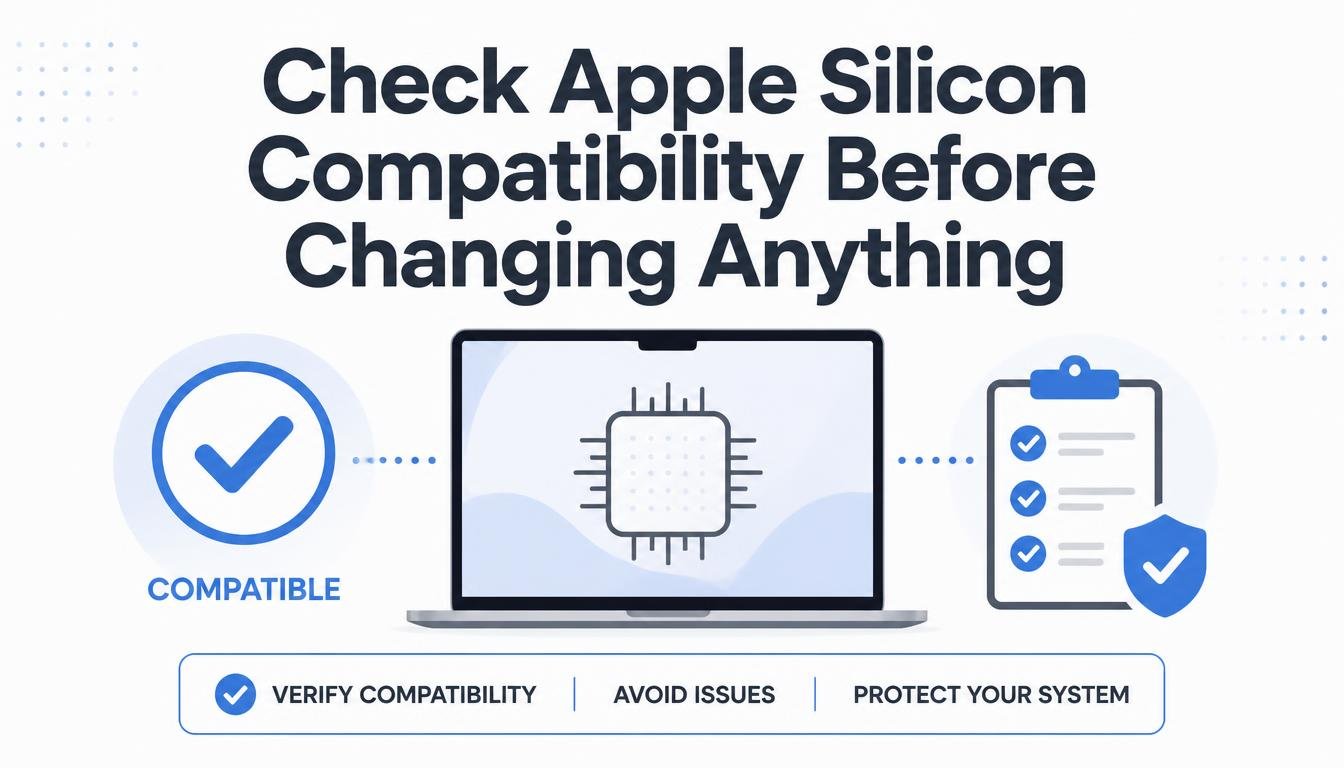
The phrase Apple Silicon covers several different chips, and treating every M-series MacBook as if it has identical display support is a recipe for buying the wrong adapter.
Start by opening the Apple menu and selecting About This Mac. Note the model name and chip, then compare them with Apple’s technical specifications for that exact machine.
Don’t rely on a product listing that simply says “compatible with MacBook Air” because that tells you very little about multiple-display support.
Here’s a useful overview of common configurations.
| MacBook chip or family | Native external display support |
| Base M1 MacBook Air | One external display |
| Base M1 13-inch MacBook Pro | One external display |
| Base M2 MacBook Air | One external display |
| M1 Pro MacBook Pro | Up to two external displays |
| M1 Max MacBook Pro | Up to four external displays |
| M2 Pro MacBook Pro | Up to two external displays |
| M2 Max MacBook Pro | Up to four external displays |
These are examples, not a substitute for checking your exact model. Supported resolutions, refresh rates, connection arrangements, and later hardware revisions can affect what is possible.
Some newer base-chip MacBook models also have different capabilities from earlier generations, so the M1 or M2 label alone isn’t enough to make a universal statement.
What If You Have an M1 MacBook Air?
Imagine you have a base M1 MacBook Air, two lovely 27-inch monitors, and a USB-C dock with two HDMI outputs. Everything connects neatly, but only one monitor becomes an independent desktop.
That may be the expected result of the Mac’s native display limit rather than a faulty dock.
If you need two external monitors, look for a compatible DisplayLink docking station or USB graphics adapter.
DisplayLink uses a different approach to delivering video over USB and can enable additional displays on supported Mac systems, including certain models that have restrictive native display support.
Before purchasing, check that the particular dock supports DisplayLink on macOS, supports your required number of independent displays, and has the resolution and refresh rate you want. A second HDMI socket alone won’t do the job.
What If You Have an M1 Pro or M2 Pro MacBook Pro?
The situation is different with a MacBook Pro featuring an M1 Pro or M2 Pro chip. These models support multiple native external displays, so a second screen that refuses to appear may indicate a connection, accessory, configuration, or compatibility problem.
Try connecting one monitor directly to the MacBook and then connecting the other through a separate supported video output. This helps determine whether the dock is restricting the setup.
Also check which ports you’re using. Two connectors on a dock might share the same underlying video signal, while direct connections to different supported outputs can provide independent displays.
It’s a small distinction, but it can make the difference between a workspace that behaves properly and one that seems determined to test your patience.
Fix 1: Check macOS Display Settings
Sometimes your MacBook recognises the monitor but doesn’t arrange it the way you expect. Other times, the display isn’t detected at all until you prompt macOS to look again.
Begin with the simplest software check before changing cables or spending money.
Open the External Display Settings
Step 1: Open System Settings
Click the Apple menu, choose System Settings, and select Displays. Depending on your macOS version, the interface and labels may differ slightly.
Step 2: Look for the missing monitor
Check whether both external displays appear in the settings. If they do, you may only need to adjust their arrangement or display mode.
Step 3: Arrange the desktop
Position the display icons to match your physical desk layout. Make sure you’re extending the desktop rather than unintentionally mirroring the screens.
If the second display is missing, disconnect and reconnect it, then check the settings again. If your macOS version offers a Detect Displays control, use it. Otherwise, reconnecting the display or restarting the Mac can help refresh detection.
A successful macOS display settings check is especially useful because it separates a display arrangement issue from a monitor that the operating system cannot see at all.
Adjust Resolution and Refresh Rate
A monitor may fail to show an image when its current connection cannot support the selected display mode. This is more likely when using an older adapter, an inexpensive hub, or a combination of high-resolution displays.
Open the display’s settings and try a supported resolution and refresh rate. If you’re troubleshooting a 4K screen, temporarily selecting a lower resolution can help determine whether bandwidth or mode compatibility is the problem.
Remember that 4K HDMI output does not guarantee 4K at 60Hz. A dock, cable, MacBook port, and monitor must all support the intended mode. An accessory limited to 4K at 30Hz may still produce a picture, but scrolling and moving windows can feel less fluid than you’d like.
Fix 2: Inspect Your USB-C Docking Station
A MacBook docking station is often the centre of a multi-monitor workspace, which makes it an obvious place to investigate when the second display disappears.
However, replacing a dock without understanding its limitations is a bit like buying a new suitcase because you packed the wrong shoes. Check the specifications first.
Confirm That the Dock Supports Independent Displays
Read the manufacturer’s specifications carefully. Look for explicit support for two extended external displays on macOS and for your exact MacBook chip.
A dock marketed as a dual-monitor accessory may rely on DisplayLink, native DisplayPort connections, or a technology that behaves differently on macOS than on Windows. Some accessories also mirror the same output across two connectors rather than providing independent desktops.
If the manufacturer mentions a driver or companion application, find out whether it is required. A regular USB-C docking station and a DisplayLink-enabled dock are not interchangeable simply because they share the same connector.
Understand the Difference Between USB-C and Thunderbolt
USB-C describes the connector shape, not a guarantee of every possible feature. Depending on the computer and accessory, a USB-C port may support data, charging, video, or a combination of these capabilities.
Thunderbolt connections can provide substantial bandwidth and support compatible display configurations, but the number of screens still depends on the MacBook’s hardware and the dock’s design.
When shopping for a MacBook dual-monitor docking station, check these details:
- The number of independent displays supported on macOS.
- Compatibility with your exact MacBook chip and model.
- Maximum resolution and refresh rate per display.
- Whether the dock uses native video output or DisplayLink.
- Whether the dock needs an external power adapter.
- Whether its USB ports, Ethernet connection, and charging features suit your everyday setup.
It’s much better to know what you’re getting before the box arrives than to discover that the second HDMI port is mostly decorative for your particular configuration.
Is the LENTION CB-D53 a Good Choice?
LENTION CB-D53
This accessory provides one HDMI video output, USB-A ports, Gigabit Ethernet, a 3.5 mm audio connection, and USB-C Power Delivery pass-through of up to 100W. The manufacturer lists its HDMI output as up to 4K at 30Hz.
Lention
It can be useful for adding everyday connectivity to a compatible MacBook, but it is not a two-HDMI-output solution. If your main goal is to connect two independent external monitors, look for a dock designed and verified for that exact purpose instead.
The distinction is worth emphasising because product descriptions sometimes make a dock sound more capable than it is for a particular computer.
The CB-D53’s charging and connectivity features may be helpful, but Power Delivery does not increase the number of displays a MacBook can natively support.
Before purchasing any accessory, verify its current specifications and your MacBook’s compatibility. A familiar brand name is reassuring, but the technical details are what matter when two screens need to work together.
Fix 3: Use DisplayLink When Native Support Isn’t Enough
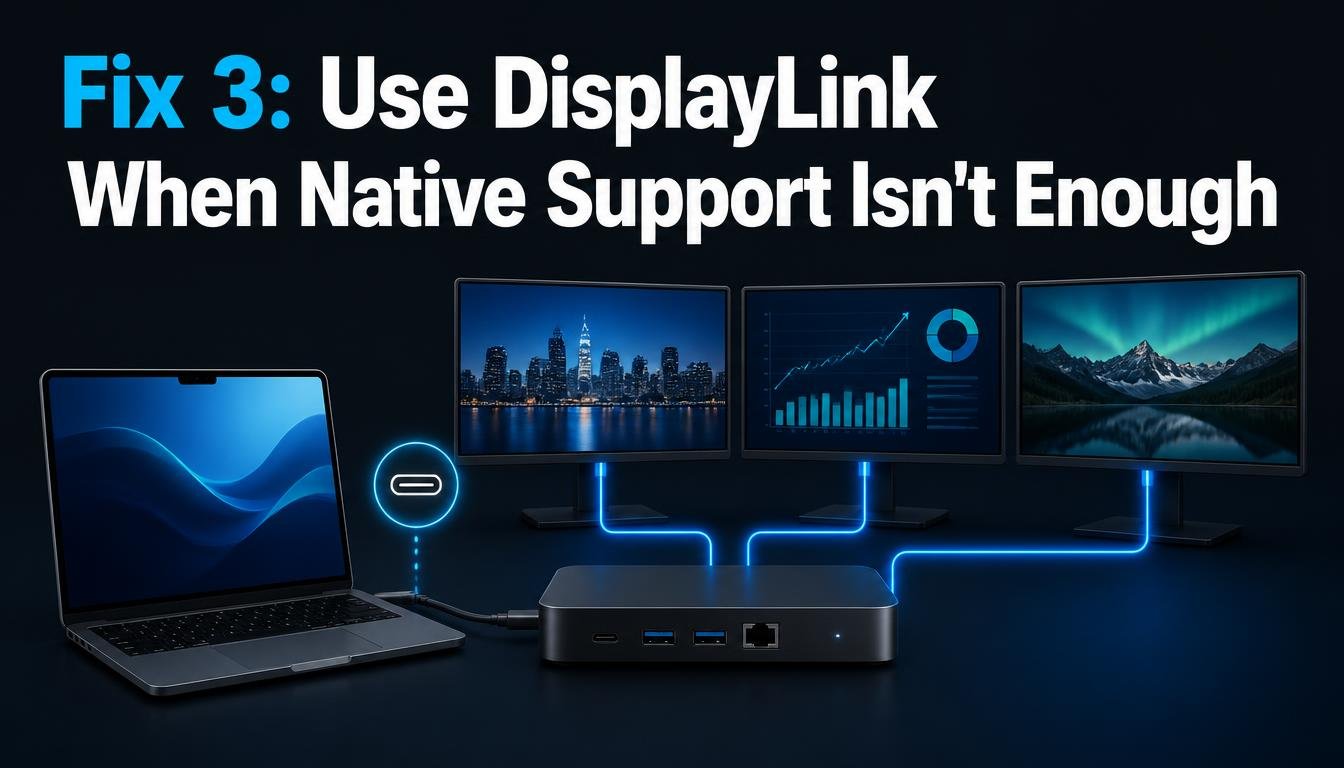
For users with a base M1 or M2 MacBook that needs more external displays than its native hardware supports, DisplayLink can be one of the most practical solutions.
Instead of depending entirely on the MacBook’s native display outputs, DisplayLink technology uses compatible USB graphics hardware and software to deliver additional display output.
That makes it particularly useful for office work, research, spreadsheets, writing, and other productivity tasks where having more screen space is genuinely valuable.
There is one important catch: you need a compatible DisplayLink-enabled dock or adapter. Installing the software by itself won’t transform an ordinary HDMI hub into a multi-monitor device.
Install DisplayLink Manager for macOS
Download the correct software
Visit the official DisplayLink Manager support page and download the version compatible with your macOS installation. Install it and open the application.
DisplayLink Support
Allow the required permission
Open System Settings and navigate to Privacy & Security. Find the Screen Recording or Screen & System Audio Recording section, depending on your macOS version, and enable the required permission for DisplayLink Manager.
Quit and reopen the application
Follow the system prompt to restart DisplayLink Manager after granting permission. Connect your compatible dock, then check whether both monitors appear in Displays settings.
DisplayLink Support
The permission request can sound alarming because it refers to screen recording. For DisplayLink, this permission allows the application to access the screen pixels needed to render content on a USB-connected display;
it isn’t an indication that the app is secretly saving recordings of your desktop. Still, only grant permissions to the legitimate software you intended to install, and download it from the official source.
What If DisplayLink Manager Doesn’t Work?
If the second screen is still missing, check whether the dock actually contains DisplayLink hardware and whether the application recognises it.
Also make sure DisplayLink Manager is running, the required permissions remain enabled, and any background activity permissions requested by macOS have been granted. A software update or operating-system update may also require you to revisit the setup process.
If your dock doesn’t support DisplayLink, these steps won’t help. In that case, you need a compatible accessory or a connection arrangement supported natively by your MacBook.
Fix 4: Check Your HDMI and DisplayPort Cables
A cable can look perfectly healthy and still be the weakest link in a multi-monitor setup. Connectors may fit snugly while the cable itself fails to support the resolution, refresh rate, or signal configuration you’re trying to use.
Start with the physical connections before assuming something more complicated is happening.
Test Each Monitor Separately
Disconnect the second monitor and connect the first one directly to a known-working MacBook video output, using an appropriate adapter if needed. Confirm that it displays an image.
Repeat the process with the second monitor using the same connection, where practical. If one screen works and the other doesn’t, swap the cables as well. This helps identify whether the problem follows the monitor, cable, or port.
If both monitors work individually but fail when connected together, the issue may be related to the dock’s capabilities, bandwidth, or the MacBook’s display limit rather than either monitor being broken.
Compare HDMI 1.4, HDMI 2.0, and DisplayPort
Different connection standards support different combinations of resolution, refresh rate, and other display features. For example, an HDMI 2.0 connection can support 4K at 60Hz under appropriate conditions, while an older or more limited connection may not.
But the label on the cable isn’t the whole story. The monitor, adapter, dock, host port, and selected display mode must all work together.
A compatible DisplayPort cable or USB-C-to-DisplayPort connection may be a better option for a particular monitor, depending on the outputs available on your MacBook and dock. If your monitor supports multiple inputs, trying an alternative input can be a useful diagnostic step.
Don’t overlook the monitor’s own input selector, either. A display set to the wrong HDMI input won’t suddenly discover the correct signal just because your MacBook is having a very determined day.
Fix 5: Restart the MacBook and Update macOS
Software glitches can occasionally interfere with external display detection, particularly after waking the MacBook from sleep, reconnecting a dock, or installing an operating-system update.
A restart is not a magical cure for every hardware limitation, but it can clear temporary problems and give macOS another opportunity to initialise connected displays.
Try this sequence:
- Save your work and disconnect the docking station.
- Shut down the MacBook, then restart it.
- Connect the first monitor and confirm it works.
- Connect the second monitor and check System Settings.
- Install any appropriate macOS updates after reviewing compatibility with your essential applications and accessories.
- Check for dock firmware updates or updated DisplayLink Manager software if your manufacturer provides them.
If your external displays stop working after an update, check the accessory manufacturer’s compatibility information before reinstalling drivers or making more substantial changes. It is possible for a software update to alter permissions or compatibility, even though the underlying hardware remains fine.
Fix 6: Make Sure the Monitors Are Extended, Not Mirrored
There’s a subtle difference between having two working monitors and having two independent workspaces. A MacBook may show the same desktop on both external displays because mirroring is enabled, which can look like a multi-monitor failure if you were expecting more space.
Open System Settings, select Displays, and inspect the available arrangement and mirroring options. The precise controls vary between macOS versions.
When extending the desktop, you should be able to move your pointer from one screen to another and place different windows on each display. If both monitors show the same content, look for the mirroring option and switch to an extended arrangement where supported.
You can also reposition the display icons so that the onscreen layout matches the real placement of your monitors. If one screen sits physically to the left of your MacBook, arranging it to the left in settings makes moving the pointer between screens feel natural.
This is a small configuration detail, but it makes the entire setup more pleasant to use.
Fix 7: Check Power, Adapters, and Bandwidth
A multi-monitor workspace asks quite a lot from a small collection of cables and accessories. If the dock also powers your MacBook, connects a keyboard, transfers files, and runs Ethernet, the whole setup deserves a little attention.
Start by checking whether the dock is receiving enough power. If the manufacturer recommends connecting a charger, do so. USB-C Power Delivery can keep a compatible MacBook charged while the dock handles other devices, but charging wattage and video capability are separate specifications.
Next, check the adapters between your MacBook and the monitors. An additional USB-C-to-HDMI adapter can introduce another compatibility point, especially when several adapters are chained together.
If you suspect bandwidth is the issue, temporarily disconnect other peripherals and test the displays at a more modest resolution. If the second screen starts working, investigate the dock’s supported display combinations and the connection’s bandwidth limits.
Avoid assuming that every USB-C port on a laptop or dock supports video output. Some are data-only, and others have different capabilities depending on the device.
How to Diagnose a MacBook Second Monitor That Isn’t Working
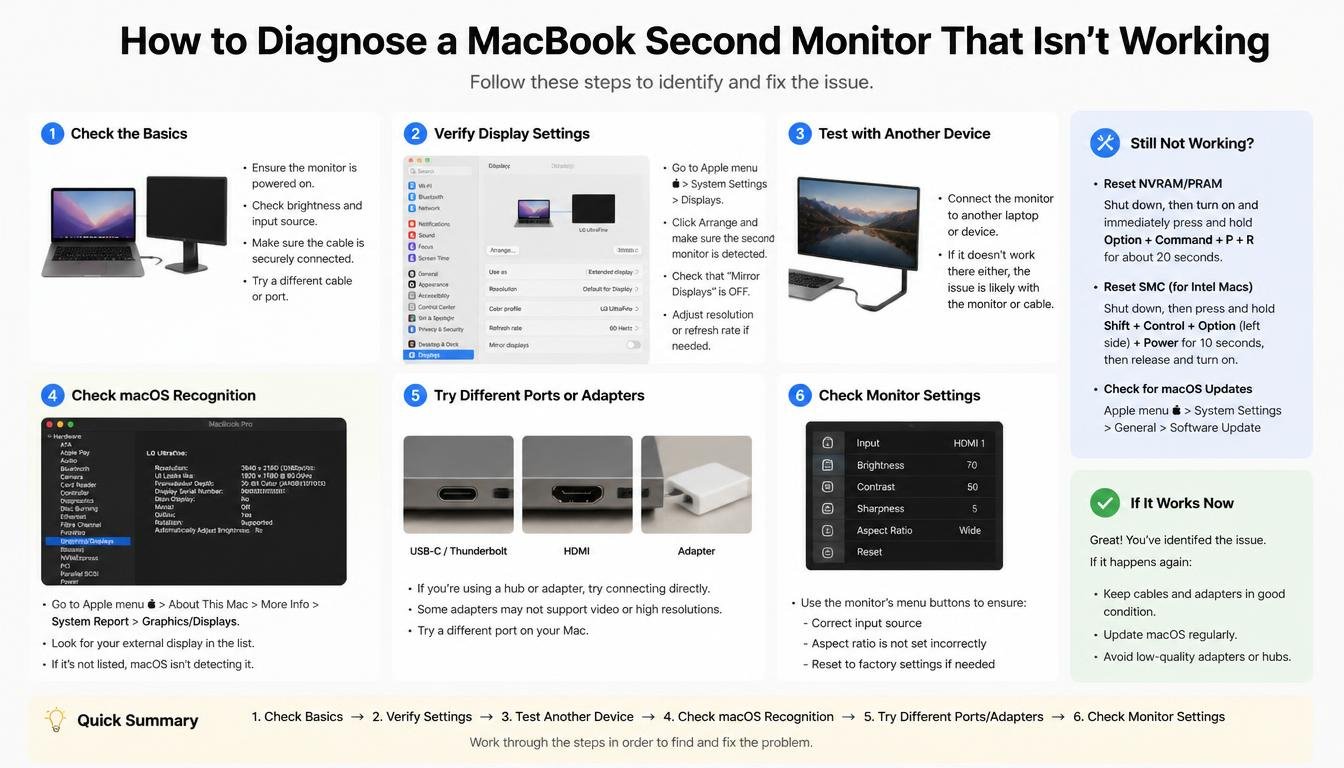
When troubleshooting becomes a tangle of cables, settings, and product specifications, the easiest approach is to work through the possibilities in a sensible order.
Use this quick checklist to narrow down the cause of your MacBook second monitor not working problem.
Troubleshooting checklist
0 of 7
Check the exact MacBook modelIdentify the chip and confirm the number of natively supported external displays.
Test both monitors separatelyConnect each monitor individually to verify that the screen and cable work.
Inspect the dockConfirm that it supports two independent displays on your MacBook and macOS version.
Check macOS Displays settingsLook for the missing display, refresh its connection, and review mirroring settings.
Verify DisplayLink if applicableConfirm that your dock uses DisplayLink and that its application and permissions are configured.
Test another cable or portTry a known-working cable and a supported alternative video connection.
Restart and updateRestart the MacBook and check for compatible software or firmware updates.
Reset checklist Get tailored help
The key is to change one thing at a time. If you swap the dock, both cables, and the monitor settings simultaneously, you might fix the problem without learning what caused it. A little patience here can save you money on accessories you never needed.
Choosing the Right Dock for a MacBook Dual Monitor Setup
If you’ve confirmed that your MacBook needs a different accessory, choose one based on your actual display requirements rather than the largest number of ports advertised on the packaging.
For a native multi-monitor setup, look for a dock that explicitly supports your MacBook’s chip, the number of external displays you want, and your preferred resolutions and refresh rates. Thunderbolt docks can be appropriate for supported systems, while some USB-C docks are sufficient for less demanding arrangements.
For a base M1 or M2 MacBook with a restrictive native display limit, a compatible DisplayLink docking station may be the more suitable option. Confirm the exact model’s macOS support before buying, and remember that DisplayLink adds a software-dependent video path rather than changing the MacBook’s native hardware capabilities.
Think about the rest of your desk, too. Gigabit Ethernet may be helpful for a stable wired network, USB-A ports can simplify connecting older peripherals, and Power Delivery can reduce cable clutter by charging your MacBook through the dock.
One last detail: if you need two 4K displays at 60Hz, make sure the dock supports that combination simultaneously. A product that advertises 4K may only achieve that resolution at a lower refresh rate, or may support different limits when multiple monitors are connected.
Frequently Asked Questions
Why does my MacBook only detect one external monitor?
The most common possibilities are a native display-support limit, a dock that cannot produce two independent displays on macOS, a missing DisplayLink configuration, or a cable or connection problem. Check the MacBook model and dock specifications first, then work through the connection and software checks.
Can an M1 MacBook Air support two external monitors?
The base M1 MacBook Air natively supports one external display. A compatible DisplayLink dock or adapter can provide a route to additional external displays, subject to its hardware, software, and resolution limitations.
Can a base M2 MacBook Air run two external monitors?
The base M2 MacBook Air’s native external display support is limited to one display. If you require two independent external monitors, investigate compatible DisplayLink solutions or verify whether your particular MacBook generation has different support.
Do I need DisplayLink for two monitors on an M1 MacBook?
Not necessarily. It depends on your exact MacBook model and its native display capabilities. Some higher-end M1 configurations, including M1 Pro and M1 Max models, support multiple external displays without DisplayLink.
A base M1 MacBook Air generally needs an alternative approach to exceed its native one-display limit.
Why does my USB-C docking station show the same image on both monitors?
The dock may be duplicating a single video signal rather than generating two independent displays. Check whether the dock supports extended desktops on macOS and whether it uses DisplayLink or native video outputs. Two HDMI sockets do not guarantee two separate workspaces.
Will an HDMI 2.0 cable fix my second monitor?
It might if the existing cable is unsuitable or defective, but HDMI 2.0 alone cannot overcome a MacBook’s native display limit or turn a basic hub into a dual-monitor dock. Check the entire connection path, including the computer, adapter, dock, and monitor.
Is DisplayLink safe to use on macOS?
DisplayLink Manager is software designed to enable compatible USB-connected displays. macOS requires particular permissions for it to access the screen pixels needed to render those displays.
Download the software from its official source and review the permissions it requests before enabling them.
Mac only detecting one monitor
If your Mac is only detecting one monitor, check your MacBook’s chip compatibility, docking station, cables, and macOS display settings. If you’re using a base M1 or M2 MacBook, you may need a DisplayLink-compatible docking station to connect multiple external monitors.
Mac detecting two monitors as one
If your Mac detects two monitors as one display, check your display arrangement in System Settings > Displays. Make sure both monitors are recognized separately and configure them to extend your desktop instead of mirroring the same screen.
Macbook only detecting one monitor
When your MacBook only detects one external monitor, the issue may be caused by hardware limitations, an incompatible USB-C hub, or a faulty cable. Try connecting each monitor individually and check whether your docking station supports multiple displays.
Mac recognizing two monitors as one
If your Mac recognizes two monitors as one, verify that your docking station supports independent displays and that macOS is configured correctly. A DisplayLink-compatible dock may be necessary for certain Apple Silicon MacBook models.
Mac display only on external monitor
If your Mac display appears only on the external monitor, open System Settings > Displays to check your display arrangement and mirroring settings. Also, verify that your MacBook’s built-in display is enabled and that the lid is open if you want to use both screens simultaneously.
Read More: https://techbiton.com/sd-card-not-reading-through-a-usb-c-hub/
Final Thoughts: Get Both Screens Working Without the Guesswork
When your MacBook only shows one external monitor, it can feel as though a perfectly reasonable setup has somehow become an expensive puzzle.
The reassuring news is that many causes are straightforward once you separate native hardware limitations from problems with cables, docks, software, and display settings.
Start with your MacBook’s exact chip and model. Check whether it supports the number of screens you want, confirm that your docking station can provide independent displays, and then work through the connection and configuration steps one by one.
If native display support isn’t enough, a compatible DisplayLink solution may be the answer. If your MacBook already supports multiple displays, a careful cable test or a change in settings may be all you need.
The goal isn’t to buy the most complicated docking station or to spend an afternoon trying every adapter in the drawer. It’s to understand what your MacBook can do, choose the right connection, and build a workspace that feels effortless once everything is plugged in.
Two external monitors can make a real difference to how comfortably you work, whether you’re managing projects, studying, creating, or simply trying to keep too many open windows from becoming a tiny digital traffic jam.
With the right hardware and a little methodical troubleshooting, that second screen may be much closer to working than you think.