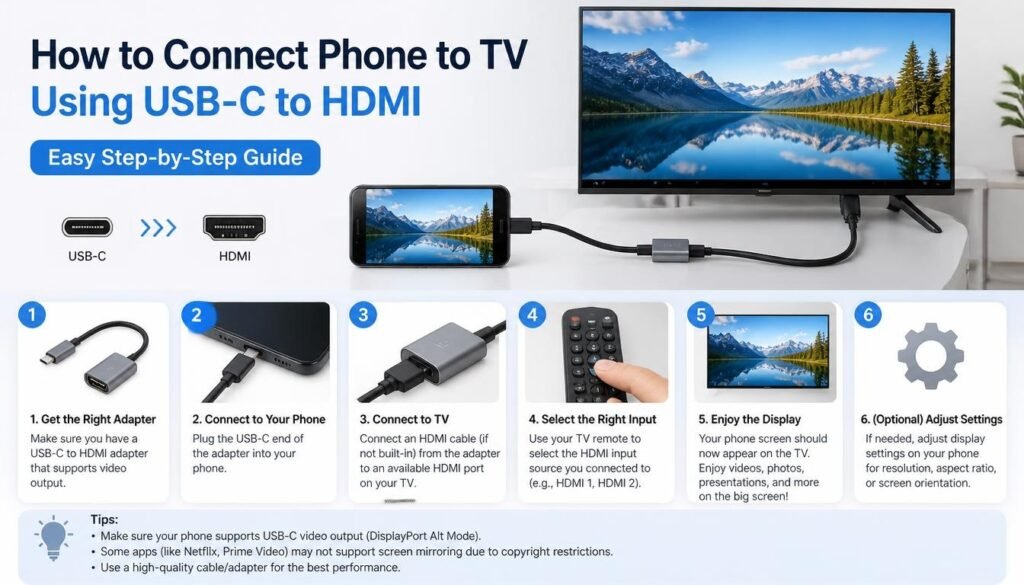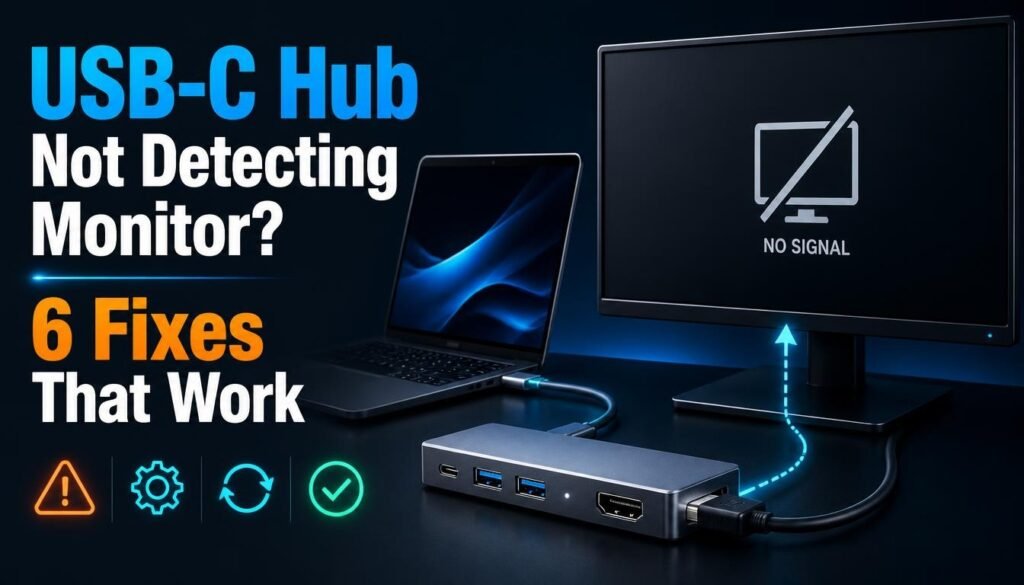

There is something particularly frustrating about buying a beautiful 4K monitor, connecting it to your laptop through a USB-C hub, and then discovering that the display stubbornly refuses to go beyond 1080p.
You check the cables, restart the laptop, open display settings, and even wonder whether the monitor has somehow forgotten what it is capable of doing. Quite annoying, isn’t it?
The situation becomes even more confusing when the same monitor works perfectly at 4K after connecting it directly to your laptop. Suddenly, the USB-C hub becomes the main suspect, and rightly so in many cases.
If your monitor is stuck at 1080p through a USB-C hub, the problem could involve HDMI bandwidth, USB-C video output compatibility,
DisplayPort Alt Mode, graphics drivers, or limitations within the hub itself. Sometimes, a seemingly small specification can make the difference between a crisp 4K picture and a display that looks like it belongs to another decade.
The good news is that you don’t necessarily need a new monitor or an expensive laptop to solve the problem. Understanding how your devices communicate is the first step towards getting the resolution you actually paid for.
Let’s explore the common causes of USB-C hub resolution issues and, more importantly, how to fix them without wasting an afternoon experimenting with random settings.
Why Is Your Monitor Stuck at 1080p Through USB-C Hub?
Before changing anything, it helps to understand why the problem happens in the first place. A USB-C connection may look simple from the outside, but it carries different types of signals depending on the hardware and supported technology.
A USB-C port doesn’t automatically guarantee high-resolution video output. Some ports support charging and data transfer only, while others support external displays through DisplayPort Alt Mode, Thunderbolt 3, Thunderbolt 4, or USB4.
Your hub also has its own limitations.
For instance, a particular USB-C hub might support 4K@30Hz but not 4K@60Hz. Another might support 4K at 60Hz with a single connected monitor but offer lower resolutions when multiple displays are attached.
Here are some common reasons behind the problem:
- The USB-C hub has a maximum HDMI output of 1080p.
- Your laptop’s USB-C port doesn’t support video output.
- The hub supports 4K@30Hz but not 4K@60Hz.
- The HDMI cable cannot carry the required video bandwidth.
- The operating system hasn’t detected the monitor’s native resolution.
- Multiple connected peripherals are competing for available bandwidth.
- Outdated graphics drivers are affecting external display detection.
The important thing is to identify which part of the connection is limiting the display. Replacing everything at once is rarely the smartest solution.
1. Check the USB-C Hub’s Maximum Resolution Support
This is probably the first thing worth checking when your monitor is stuck at 1080p through a USB-C hub.
Not every USB-C hub is designed to handle the same display resolution. Some affordable models are primarily intended for everyday office work, while others are built for demanding external monitor setups.
Look at the technical specifications of your hub and find its maximum supported HDMI resolution.
You might come across descriptions such as:
- 1920 × 1080 at 60Hz
- 2560 × 1440 at 60Hz
- 3840 × 2160 at 30Hz
- 3840 × 2160 at 60Hz
- 3840 × 2160 at 120Hz
These specifications aren’t interchangeable.
A hub advertising 4K support may only deliver 4K at 30Hz, which is noticeably less fluid than 60Hz during everyday computer use.
If your monitor supports 4K@60Hz but the hub supports only 4K@30Hz, you may have found the limitation.
Check the manufacturer’s product page rather than relying on a short marketplace description. The maximum resolution can also depend on the laptop, operating system, and number of connected displays.
Practical tip: If you own a Lention USB-C hub, check the exact model’s specifications before assuming every hub in the product range supports identical video output.
2. Understand USB-C Video Output and DisplayPort Alt Mode
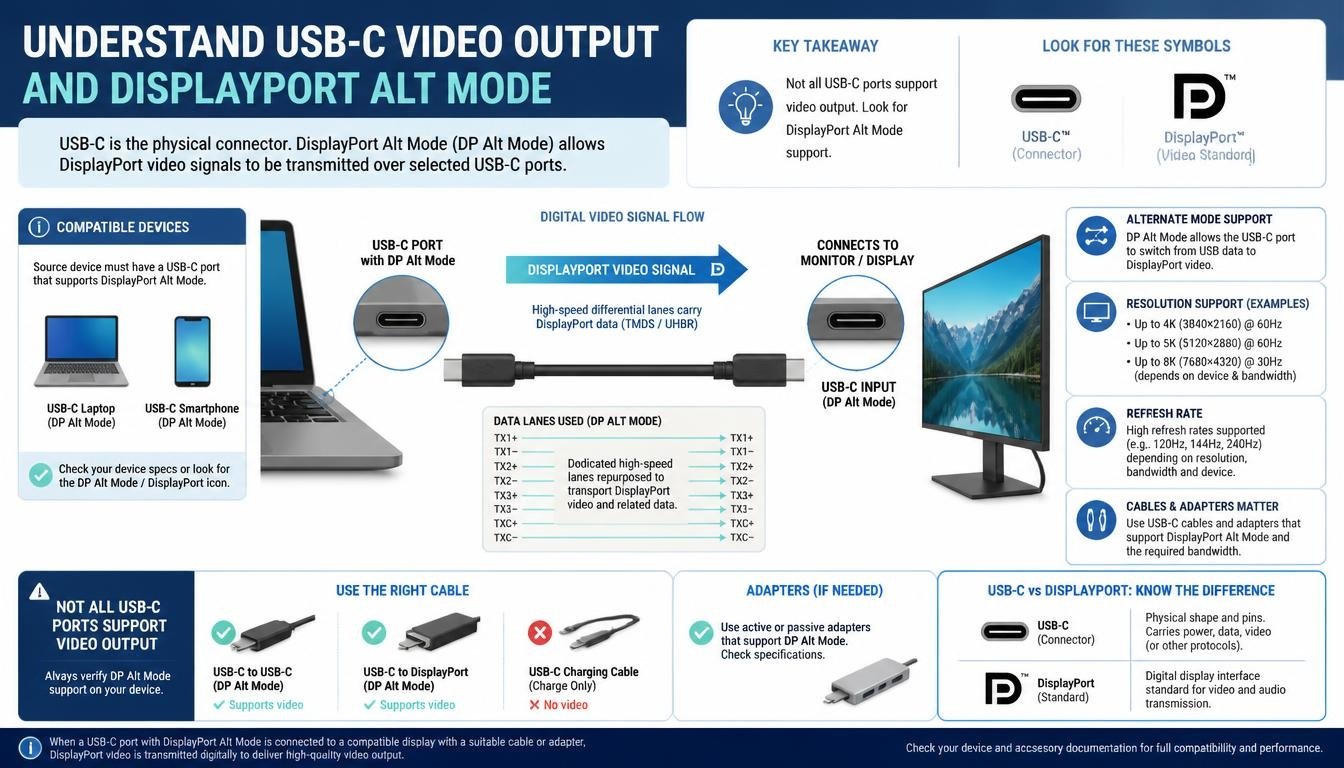
USB-C describes a connector, not a guarantee of particular video capabilities. This is one of the most misunderstood aspects of external monitor connectivity.
Your laptop needs to support video transmission through its USB-C port. One common technology responsible for this is DisplayPort Alt Mode.
It allows a compatible USB-C port to transmit DisplayPort video signals through the USB-C connection. A compatible hub can then convert that signal into HDMI for your monitor.
However, there is an important distinction between USB-C ports.
Some support:
- Power delivery and charging only.
- USB data transfer without video.
- DisplayPort Alt Mode for external displays.
- Thunderbolt connectivity with additional display capabilities.
- USB4 with supported display functionality.
If your laptop has a USB-C port that supports charging and data transfer but not video output, connecting a regular USB-C-to-HDMI adapter won’t magically create a display signal.
Check your laptop manufacturer’s specifications. Look for a DisplayPort symbol, Thunderbolt symbol, or an explicit statement confirming external display support.
Thunderbolt 3 and Thunderbolt 4 can provide powerful external display connectivity, although the actual resolution and refresh rate still depend on the laptop, graphics hardware, hub, and monitor.
Thunderbolt 5 and newer USB4 implementations also offer additional bandwidth possibilities, but compatibility should always be verified rather than assumed.
3. Check HDMI Bandwidth Limitations
Your USB-C hub might support high-resolution video, but that doesn’t mean every HDMI connection will deliver it.
HDMI carries video information using a specific amount of bandwidth. Higher resolutions and refresh rates require more bandwidth, especially when HDR or additional color-depth features are enabled.
This is where understanding HDMI 1.4 vs HDMI 2.0 vs HDMI 2.1 becomes useful.
Here’s a simplified comparison:
| HDMI standard | Typical display capability |
| HDMI 1.4 | 4K@30Hz |
| HDMI 2.0 | 4K@60Hz |
| HDMI 2.1 | Higher-bandwidth 4K and 8K modes, depending on implementation |
These are general capabilities, not guarantees for every device or video configuration.
For example, an older hub with HDMI 1.4 output might display your 4K monitor at 30Hz, while a newer HDMI 2.0-compatible hub may support 4K@60Hz.
If your monitor only displays 1080p, the issue could be related to the actual HDMI output implementation or another limitation in the connection chain.
Check the HDMI specifications of both your hub and monitor. Also, remember that an HDMI 2.1 label alone doesn’t mean every device supports every possible 4K@120Hz mode.
The complete setup must support the required resolution, refresh rate, and video format.
4. Replace or Test Your HDMI Cable
A cable may look perfectly fine and still create display problems.
An older or damaged HDMI cable can struggle with higher-bandwidth video signals. Sometimes the monitor works at 1080p but fails to display a stable image at 4K.
This is especially frustrating because everything appears to work until you select a higher resolution.
Try these simple checks:
- Disconnect the existing HDMI cable and reconnect it securely.
- Test another HDMI cable rated for the required bandwidth.
- Avoid unnecessarily long or low-quality cables.
- Try another HDMI input on your monitor.
- Check whether the monitor detects the connection consistently.
- Test the same cable with another compatible device.
For 4K@60Hz, a certified Premium High Speed HDMI cable is generally an appropriate starting point, subject to the complete system’s requirements.
For higher-bandwidth HDMI 2.1 features, an appropriate Ultra High Speed HDMI cable may be necessary.
One useful experiment is connecting your laptop directly to the monitor using the same cable. If the monitor reaches its native resolution, the cable is less likely to be the problem, although this doesn’t rule out every compatibility issue.
Don’t underestimate a cable. It is a small component, but it carries the entire video signal.
5. Change External Monitor Resolution Settings in Windows
Sometimes the hardware supports everything correctly, but Windows simply hasn’t selected the appropriate display configuration.
If your Windows external monitor resolution is limited to 1920 × 1080, check the display settings manually.
Follow these steps:
- Right-click anywhere on your desktop.
- Select Display settings.
- Scroll to the Display resolution section.
- Choose the external monitor if multiple displays are connected.
- Open the resolution dropdown menu.
- Look for your monitor’s native resolution, such as 2560 × 1440 or 3840 × 2160.
- Select the recommended option if available.
Windows may also show a refresh-rate setting under Advanced display.
Open it and check whether your monitor supports 60Hz at the selected resolution.
If 4K is available at 30Hz but not 60Hz, investigate the hub’s bandwidth and the HDMI connection before changing unrelated settings.
Also, make sure you’re using Extended display mode if you want the external monitor to operate independently.
Press Windows + P and select Extend.
Mirror Mode can sometimes create resolution restrictions because Windows attempts to use a display mode compatible with both screens.
If the desired resolution is still missing, update your graphics driver through your laptop manufacturer’s support page or the appropriate graphics provider.
6. Fix Mac External Monitor Stuck at 1080p
Mac users can encounter a similar problem, especially when connecting a MacBook to a 4K monitor through a USB-C multiport hub.
The display might appear correctly, but the available resolution options are limited. In some cases, the monitor works at 4K when connected directly but falls back to 1080p through the hub.
Start with the basic display configuration.
- Open the Apple menu.
- Select System Settings.
- Choose Displays.
- Select the external monitor.
- Review the available resolution options.
- Check whether the native resolution is available.
On supported macOS versions, holding the Option key while accessing resolution controls may reveal additional resolution options. The exact interface varies by macOS version and display configuration.
If you’re using a MacBook, also check whether the USB-C port supports the required display output.
Some users accidentally purchase a USB-C hub that supports the connector type but not the display features they expect. It is a surprisingly common purchasing mistake.
Another thing worth checking is Mirror Mode.
When your Mac mirrors its built-in display to an external monitor, the available resolution may be influenced by the compatibility of both displays.
Try switching to an extended desktop instead.
If the external display still refuses to show its native resolution, test another cable and connect the monitor directly to the MacBook where possible.
7. Understand the Difference Between 4K@30Hz and 4K@60Hz
Resolution isn’t the only thing that determines display quality.
Refresh rate matters too, and it can make a noticeable difference during everyday computer use.
A monitor operating at 4K@30Hz displays 30 frames per second. At 4K@60Hz, it can display 60 frames per second.
The difference is particularly noticeable when moving windows, scrolling webpages, watching motion-heavy content, or working with animations.
Here’s a quick comparison:
| Display mode | Resolution | Refresh rate |
| Full HD | 1920 × 1080 | 60Hz |
| QHD | 2560 × 1440 | 60Hz |
| 4K UHD | 3840 × 2160 | 30Hz |
| 4K UHD | 3840 × 2160 | 60Hz |
| 4K UHD | 3840 × 2160 | 120Hz |
If your USB-C hub supports 4K@30Hz, don’t expect it to automatically provide 4K@60Hz.
Similarly, a 4K@120Hz monitor needs a much more capable video connection.
For regular office work, 4K@60Hz is often a comfortable combination of sharpness and smoothness.
If your monitor is stuck at 1080p, however, increasing the refresh rate won’t solve an underlying resolution limitation. Both specifications need to be checked separately.
8. Disconnect Other Devices and Check Available Bandwidth
A USB-C hub is useful because it brings multiple connections together in one place.
You can connect an external monitor, keyboard, mouse, Ethernet cable, external SSD, and SD card reader through a single laptop port.
Convenient? Absolutely.
But depending on the hub’s design, some resources are shared between connected devices.
DisplayPort Alt Mode may allocate USB-C high-speed lanes to video transmission, reducing the bandwidth available for certain USB data connections.
Other hubs use different architectures, and their behaviour depends on the internal controller and supported standards.
If your monitor suddenly switches to a lower resolution after connecting several peripherals, try a simple test.
Disconnect everything except the monitor.
Restart the laptop and check whether the higher resolution becomes available.
Then reconnect your accessories one by one.
Pay particular attention to external SSDs, high-speed storage devices, and other demanding peripherals.
This doesn’t mean an external SSD automatically reduces display resolution. Rather, it helps identify whether your particular hub has a shared-bandwidth or compatibility limitation.
If the display works perfectly with fewer devices connected, consult the hub’s specifications for simultaneous display and USB data capabilities.
9. Update Graphics Drivers and Check Display Detection
Graphics drivers help your operating system communicate with the graphics hardware and connected displays.
An outdated or corrupted driver can occasionally prevent the computer from detecting the correct monitor capabilities.
This may result in missing resolution options, incorrect refresh rates, or an external display that appears blurry.
For Windows:
- Open Device Manager.
- Expand Display adapters.
- Identify your graphics hardware.
- Check the laptop manufacturer’s website for available graphics driver updates.
- Install the appropriate supported update.
- Restart your computer.
- Recheck the external monitor settings.
For Intel, AMD, and NVIDIA graphics systems, use the appropriate official driver source or your laptop manufacturer’s recommended package.
On macOS, graphics drivers are generally managed through system updates rather than separate manual driver installations.
Also, check the monitor’s own settings.
Some monitors offer a PC Mode, HDMI compatibility mode, or enhanced-bandwidth setting. The names differ between manufacturers.
If your monitor has an option for enabling higher-bandwidth HDMI input, make sure it is configured appropriately.
Resetting the monitor’s settings can also help when an unusual configuration is interfering with detection.
10. Check Monitor Compatibility, Native Resolution, and Input Settings
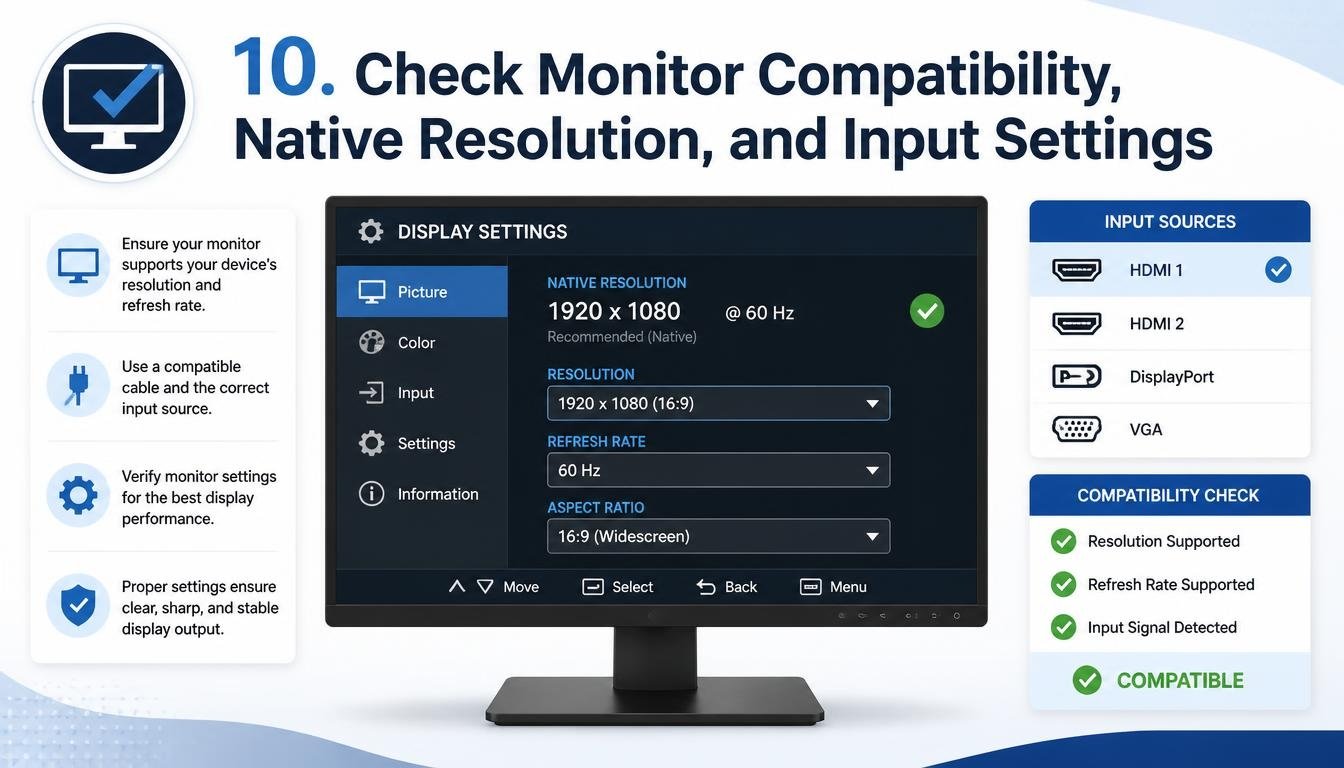
Your monitor has a native resolution, which is the physical pixel arrangement it is designed to display most accurately.
For example:
- Full HD: 1920 × 1080
- QHD or 2K-class display: 2560 × 1440
- 4K UHD: 3840 × 2160
An ultrawide monitor may use a different native resolution, such as 3440 × 1440.
If a 4K monitor only shows 1080p, the image may look blurry because the display is scaling a lower-resolution signal to fit its physical panel.
Check the monitor’s specifications and confirm that the selected HDMI input supports the desired resolution and refresh rate.
Also, select the correct monitor input source.
For example, if your monitor has multiple HDMI ports, one may support different capabilities from another depending on the model.
A quick monitor compatibility check can save you from spending money on another adapter unnecessarily.
11. Choose a USB-C Hub That Actually Supports 4K@60Hz
If you’ve tried the troubleshooting steps and your monitor remains limited to 1080p, it may be time to consider whether the hub itself is suitable for your setup.
When choosing a replacement, don’t simply search for a USB-C hub with 4K support.
That description is too broad.
Instead, examine the actual technical specifications.
Look for these features:
- HDMI 2.0 or a higher-bandwidth HDMI implementation when 4K@60Hz is required.
- Explicit support for 3840 × 2160 at 60Hz.
- Compatibility with your laptop’s USB-C video output.
- DisplayPort Alt Mode or compatible Thunderbolt/USB4 support.
- Support for the required resolution when other hub ports are in use.
- Appropriate power delivery for your laptop.
- Compatibility with your operating system.
A USB-C docking station with 4K 60Hz HDMI may be more appropriate for a workstation with several peripherals.
On the other hand, a compact USB-C multiport adapter might be perfectly adequate if you only need one external display, charging, and occasional USB connections.
Lention offers USB-C connectivity products for users who want to simplify their desk setup. When considering any Lention model, compare its exact HDMI output specifications with your monitor and laptop requirements.
The best hub isn’t necessarily the one with the most ports. It is the one that supports the combination of features you actually intend to use.
Common USB-C Hub Resolution Problems and Their Solutions
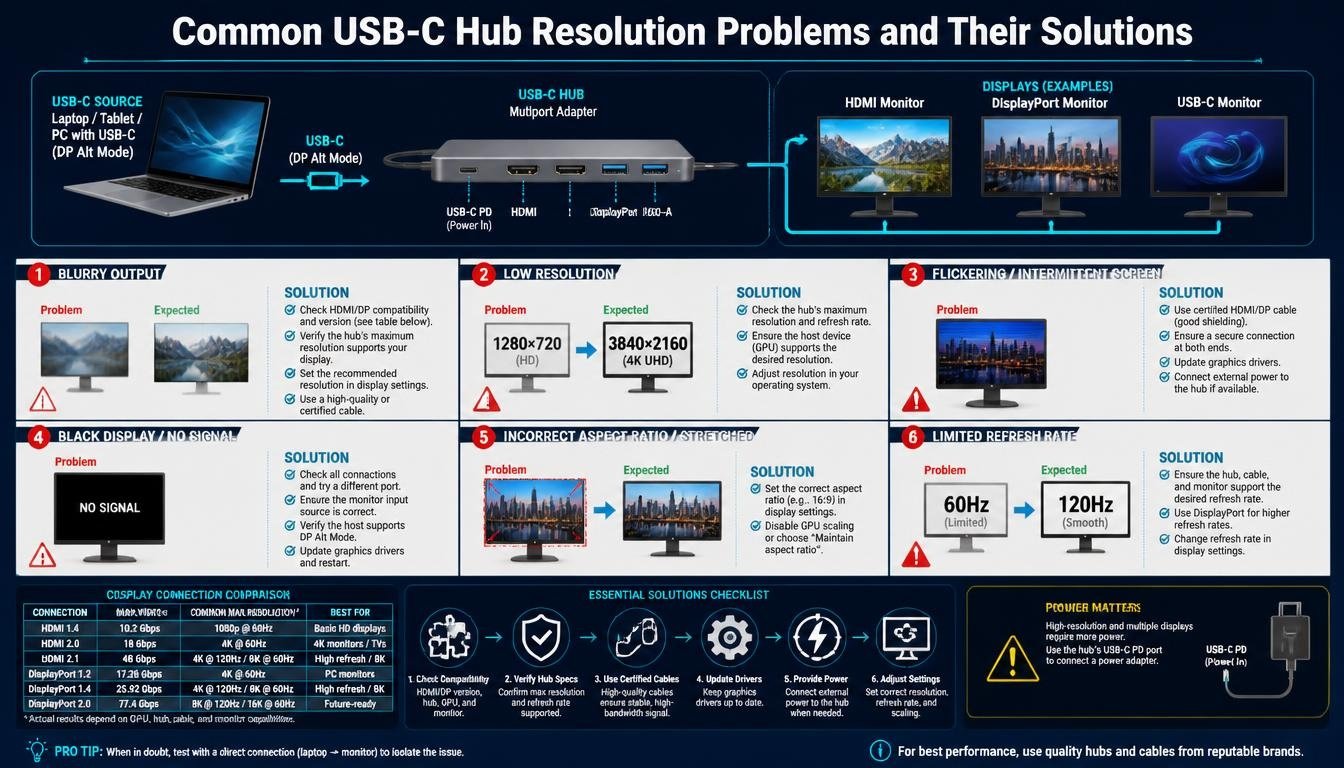
Sometimes, you don’t need to read an entire troubleshooting guide to identify what’s wrong. A quick comparison can point you in the right direction.
| Problem | Possible cause | What to try |
| Monitor stuck at 1080p | Hub output limitation | Check maximum resolution |
| 4K only available at 30Hz | HDMI bandwidth limitation | Verify HDMI standard |
| 2K resolution missing | Compatibility or driver issue | Update graphics drivers |
| Monitor appears blurry | Incorrect display scaling | Select native resolution |
| No external display detected | USB-C port lacks video support | Check DisplayPort Alt Mode |
| Resolution changes with peripherals | Shared hub bandwidth | Disconnect other devices |
| MacBook only shows 1080p | Hub or macOS display limitation | Check Displays settings |
| Display flickers at 4K | Cable or signal instability | Test another compatible cable |
These are starting points rather than absolute diagnoses. More than one component can contribute to the same symptom.
Frequently Asked Questions
Why is my 4K monitor only showing 1080p through a USB-C hub?
The most likely explanations include a hub with limited HDMI output, a laptop USB-C port without the necessary video support, or a bandwidth limitation somewhere in the connection. Check the specifications of the laptop, hub, cable, and monitor together.
Does every USB-C hub support 4K resolution?
No. USB-C describes the connector, not the maximum supported display resolution. Some hubs support only Full HD, while others support 4K@30Hz or 4K@60Hz. Always check the exact model specifications.
How do I get 4K@60Hz through a USB-C hub?
Your laptop must support compatible video output, your hub must explicitly support 4K@60Hz, and your HDMI cable and monitor must support the required bandwidth. You should also verify that the selected display settings allow 60Hz at 4K.
Can an HDMI cable limit monitor resolution?
Yes. An older, damaged, or unsuitable cable can prevent stable high-resolution video transmission. Test with a certified cable that supports the bandwidth required by your display mode.
Why does my monitor display 4K when connected directly but not through a hub?
This is a useful clue that the hub or its interaction with the laptop may be limiting video output. Check the hub’s HDMI specifications, its supported DisplayPort input capabilities, and any bandwidth-sharing restrictions.
Why is my 2K resolution missing from Windows?
Possible causes include graphics driver issues, monitor detection problems, cable limitations, or unsupported output modes. Check Advanced display settings and confirm that your hub supports 2560 × 1440 at the desired refresh rate.
Does Thunderbolt support higher monitor resolutions?
Thunderbolt 3, Thunderbolt 4, and Thunderbolt 5 can support capable external display configurations, but the actual output depends on the computer, dock, display, and supported video modes. The Thunderbolt label alone doesn’t guarantee a particular resolution.
Is 4K@30Hz good enough for everyday work?
It can be suitable for basic tasks such as reading documents and viewing static content. However, 4K@60Hz generally provides smoother movement, scrolling, and desktop interaction, making it a more comfortable option for many users.
Can macOS force a higher external monitor resolution?
macOS provides display resolution controls, and supported versions may expose additional options through the Displays settings. However, software settings cannot overcome a physical hardware or bandwidth limitation.
Should I buy a USB-C to HDMI adapter instead of a hub?
If you only need an external monitor, a compatible USB-C-to-HDMI adapter may simplify the connection. Just make sure it supports your laptop’s video output and the resolution and refresh rate required by your monitor.
Read More: https://techbiton.com/how-to-connect-usb-c-to-hdmi/
How to Prevent USB-C Hub Resolution Problems in the Future
The easiest way to avoid these issues is to check compatibility before purchasing a hub.
A product description mentioning USB-C, HDMI, or even 4K isn’t enough. You need to know the actual output resolution and refresh rate.
Start with your laptop’s technical specifications. Confirm whether its USB-C port supports DisplayPort Alt Mode, Thunderbolt, or USB4 video output.
Next, check the monitor’s native resolution and HDMI input capabilities.
Finally, compare those specifications with the hub’s maximum supported output.
It is also worth thinking about your future setup. If you’re planning to use two monitors, connect an external SSD, and run Ethernet through the same hub, make sure the product supports that particular combination.
A little research beforehand can prevent the familiar experience of opening a new box, connecting everything, and discovering that the display refuses to cooperate.
Conclusion: Get Your Monitor Back to Its Full Resolution
A monitor stuck at 1080p through a USB-C hub doesn’t necessarily indicate a faulty monitor or laptop. More often, the issue comes down to compatibility between the USB-C port, hub, HDMI output, cable, and display settings.
Start by checking the hub’s maximum resolution, confirming USB-C video output support, and understanding the HDMI bandwidth requirements. Then work through cable testing, Windows or macOS settings, graphics drivers, and connected peripherals.
If the hardware cannot support your desired display mode, replacing the hub with a properly compatible model may be the simplest long-term solution.
Whether you’re using a MacBook, Windows laptop, 2K monitor, or 4K ultrawide display, the goal is the same: a reliable connection that delivers the resolution and refresh rate your equipment is designed to provide.
And one final thought: don’t let a tiny USB-C hub become the reason your beautiful high-resolution monitor spends its days pretending to be an old Full HD screen. Check the specifications, troubleshoot patiently, and give your display the connection it deserves.